Stacking of Images
STACKING OF IMAGES
When observing a very dim object stacking of the images obtained is a very useful method to enhance the Signal to Noise ratio of the image.
Remember that asteroids are moving objects. A fast and dim asteroid is particularly hard to track.
In this lesson we will learn how to do that following examples of work performed by Carlos Colazo and Raul Melia with objects they followed up a few years ago.
To perform this exercise you will need to download the following subdirectories and unzip them in the directory you use to work with Astrometrica.
Each directory contains images and information about one asteroid.
Notice that all directories above have the following structure after unzipping them:
several XXX...YYYY...ZZZ.fit files, one XXX...YYYY...ZZZ_observ.txt and one XXX...YYYY...ZZZ_datos.txt.
Open Astrometrica and be sure it reads the MPCORB.dat file (reading the MPCORB database).
Open the file XXX...YYYY...ZZZ_datos.txt that corresponds to the first asteroid.
Load one of the images from the directory that corresponds to the above asteroid.
Click on the Astrometric Data Reduction button. When the window asking for the object pops up, go to the text file and copy from it the coordinates to enter in the objects name/coordinates window.
As the red circles come up move them until they align with the stars in your field.
Perform a second reduction of the same image. The program will register the coordinates of the center of the image to use in the other images.
verify the cardinal points in the image (which is N, E, etc) and make a note of them. Close the image.
Click on the Stack Images button. Look up and select images in the directory you are working with (with add button). Enter the information about the asteroid velocity and direction of motion. Click OK. The images will be stacked with stars leaving traces and the asteroid becoming a still object in the resulting image.
Perform another stacking with the rest of the images following the sequence in the directory.
Use the blink button to detect the asteroid. Verify that the asteroid moves parallel to the star traces. Check that the direction in which your candidate is moving corresponds to the data file.
In the File menu select File/Reset File. Select the asteroid. Verify that the SNR is larger than 7 and that the magnitude is similar to the theoretical one.
Click on the object. The Object verification will pop up. Enter the object name in the blank slot where it reads “object designation”. Accept after verifying the identification. A magenta circle will come up with the object name.
A new astrometry line will appear shall be added in "File/View MPC Report File”. If it doesn’t, be sure you have the blinking image mode closed.
Perform the astrometries of the other images avoiding those in which the asteroid is too close to stars or where SNR is too low. It is convenient to have astrometries separated in time (why?).
Obtain at least three astrometries per each of
P10iPQz
VY2A549
WC3C85F
WC3C872
Copy the astrometries of all objects and save them in a file Lastname_name_XXXX.txt.
In each of the downloaded subdirectories there is a file XXX...YYYY...ZZZ_observ.txt. This file contains the observed astrometries for the asteroid you are working with. Paste your astrometries (saved in Lastname_name_XXXX.txt) after the data in the XXX...YYYY...ZZZ_observ.txt file. Save the file with your changes.
Open the software Find_Orb. Open the saved files XXX...YYYY...ZZZ_observ.txt
Select all perturbers off and run it several times including a few with Full step until the mean residuals don’t change any longer.
Check that the residuals are smaller than 1 arcsec.

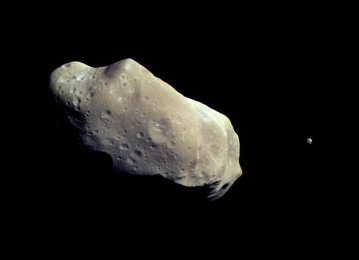
243 Ida and its moon Dactyl. Dactyl is the first satellite of an asteroid to be discovered. (image from NASA/JPL - NASA planetary photojourna). The photograph is made from images taken by the imaging system on the Galileo spacecraft about 14 minutes before its closest approach to asteroid 243 Ida on August 28, 1993, at a distance of about 10,500 kilometers.
Lesson 9